Repairing A Broken Neck Copyright © Dell Sweet 2016
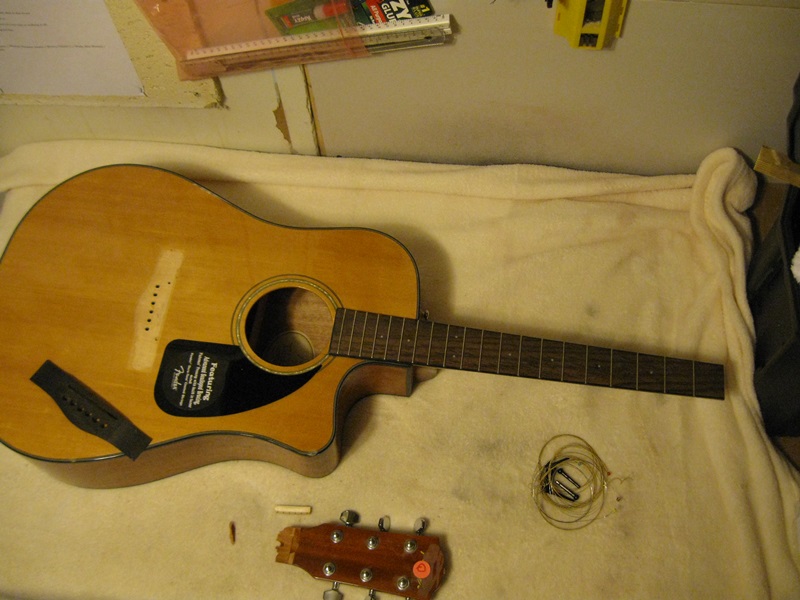
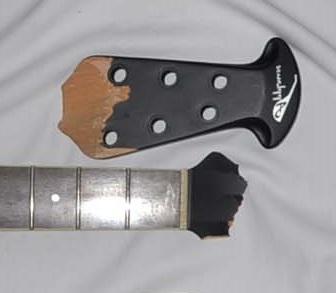
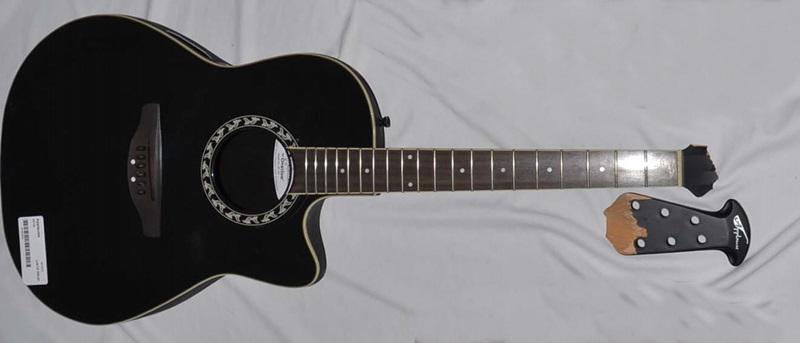
I will show the broken neck repairs to an Ovation as well as this Fender CD60.
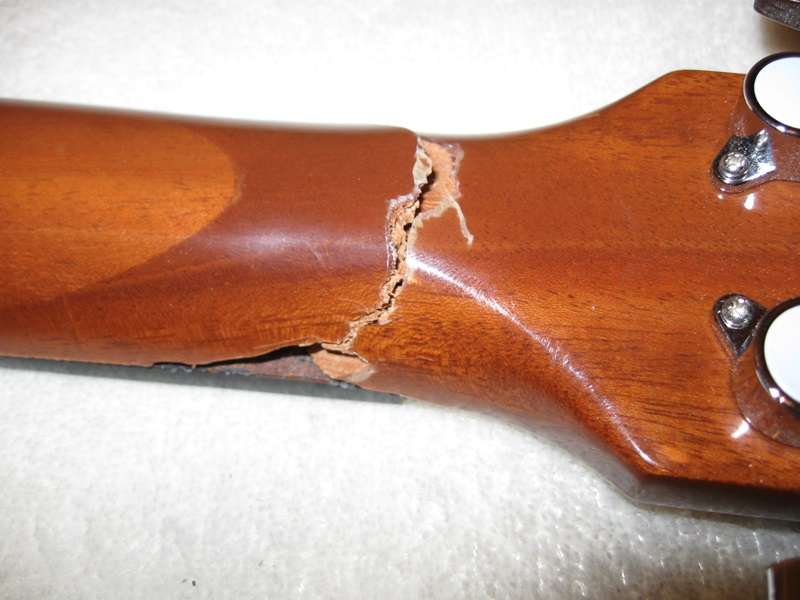
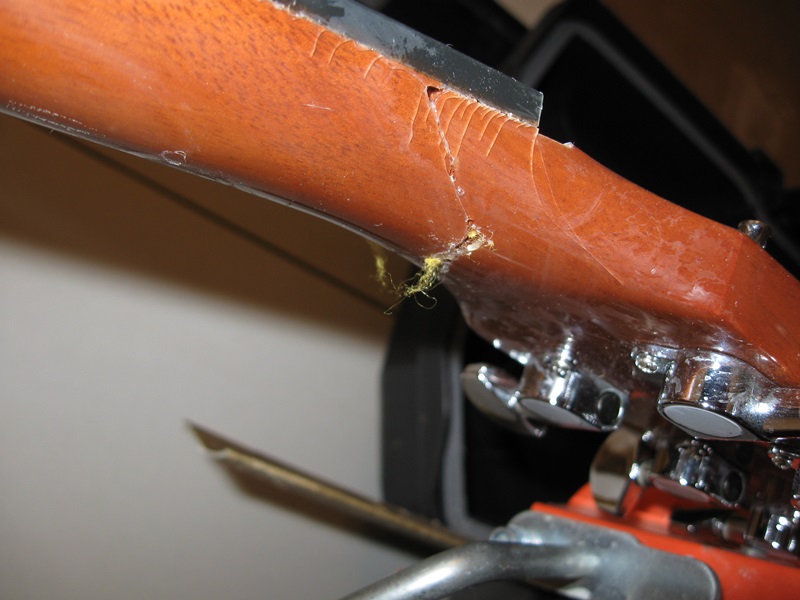
Both had similar breaks at the headstock, with the headstock snapped off and finish and wood loss at the break site.
The beauty of a guitar like this is that you can usually pick it up for a fraction of the retail price, repair it and have less in the finished guitar than if you had purchased a lesser used guitar. And most often it will be a much better guitar because you will have not only repaired it but it set it up to suit you as you built it.
The first thing to do is get the tools, glues and clamps you will use together. I like to have everything I need right there as I do the repair. No leaving to search out this clamp or that block of wood. In this case, clamps to hold the repair, aliphatic resin wood glue for the initial repairs, soft cloth to protect the neck surface and fret board from the clamp jaws. A damp cloth to remove excess glue and a few small blocks of wood to keep things aligned correctly during the clamping process.
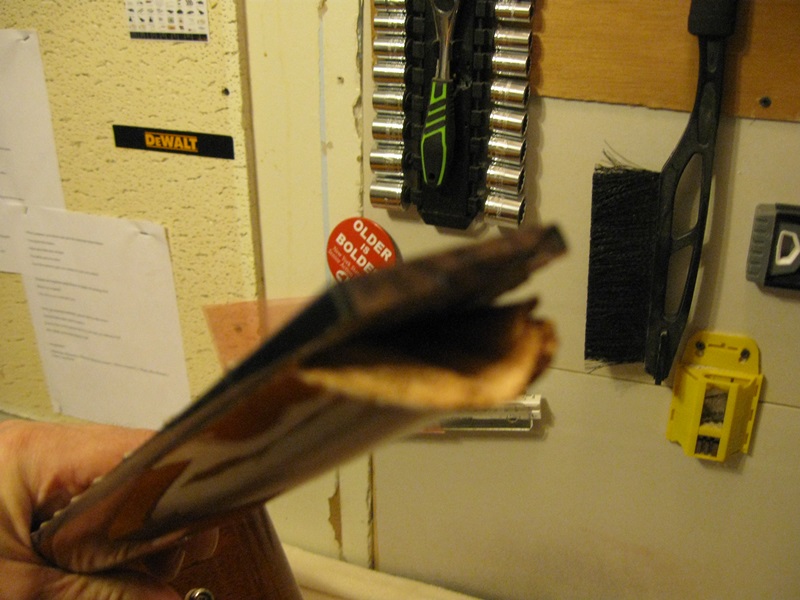
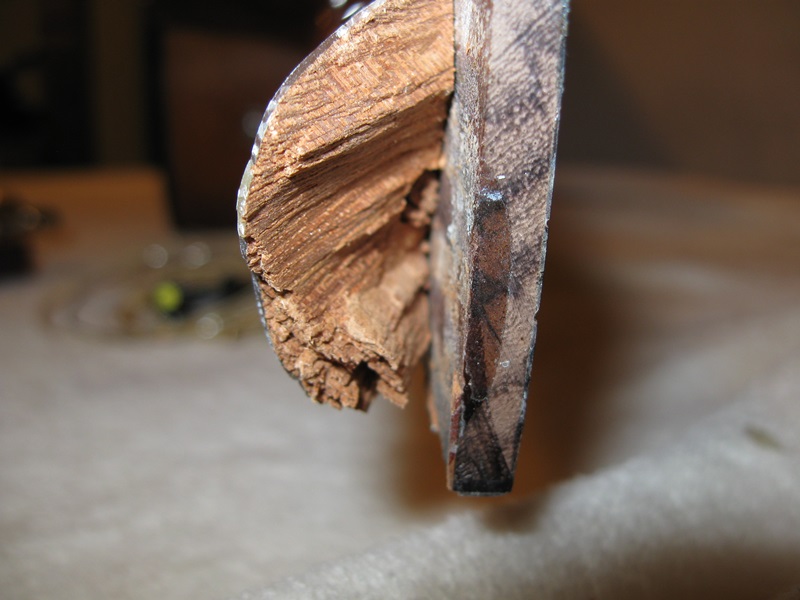
Here I am looking the break over, test fitting the pieces, seeing exactly how bad the break is and making sure I am aware of where I need to make sure the glue gets to. In the bottom photo you can see that I need to make sure the glue gets deep into the fracture.
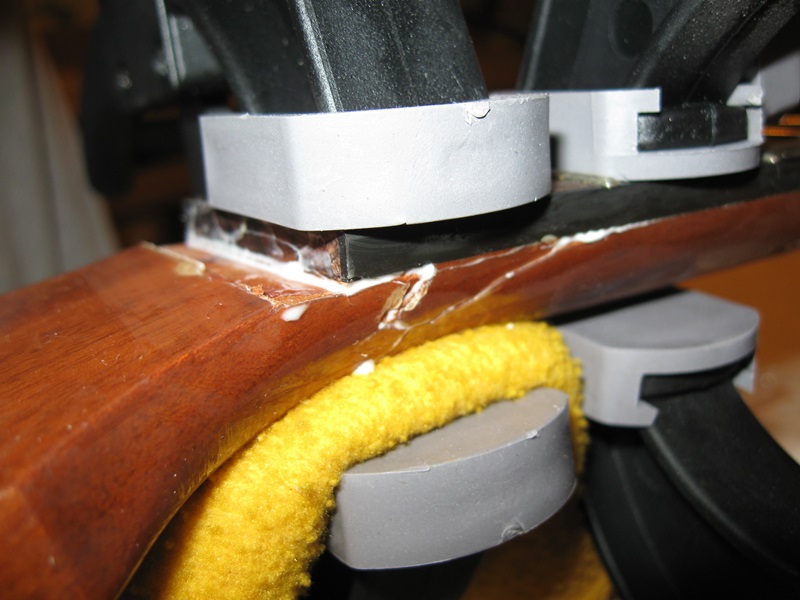
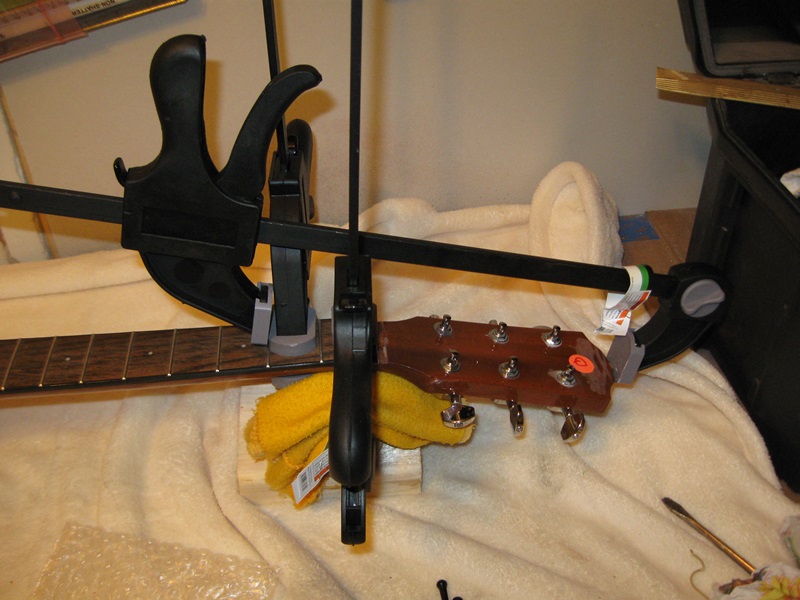
Clamping in two places on the flat and then running another clamp across the top to keep the pressure on the horizontal plane so that the neck position is correct as it dries. Notice I have placed the flat clamps (Down force) first and then used the foot of the first clamp as a base to bring the headstock in and level. I have used a soft cloth as a pad to protect the neck in front of and in back of the break.
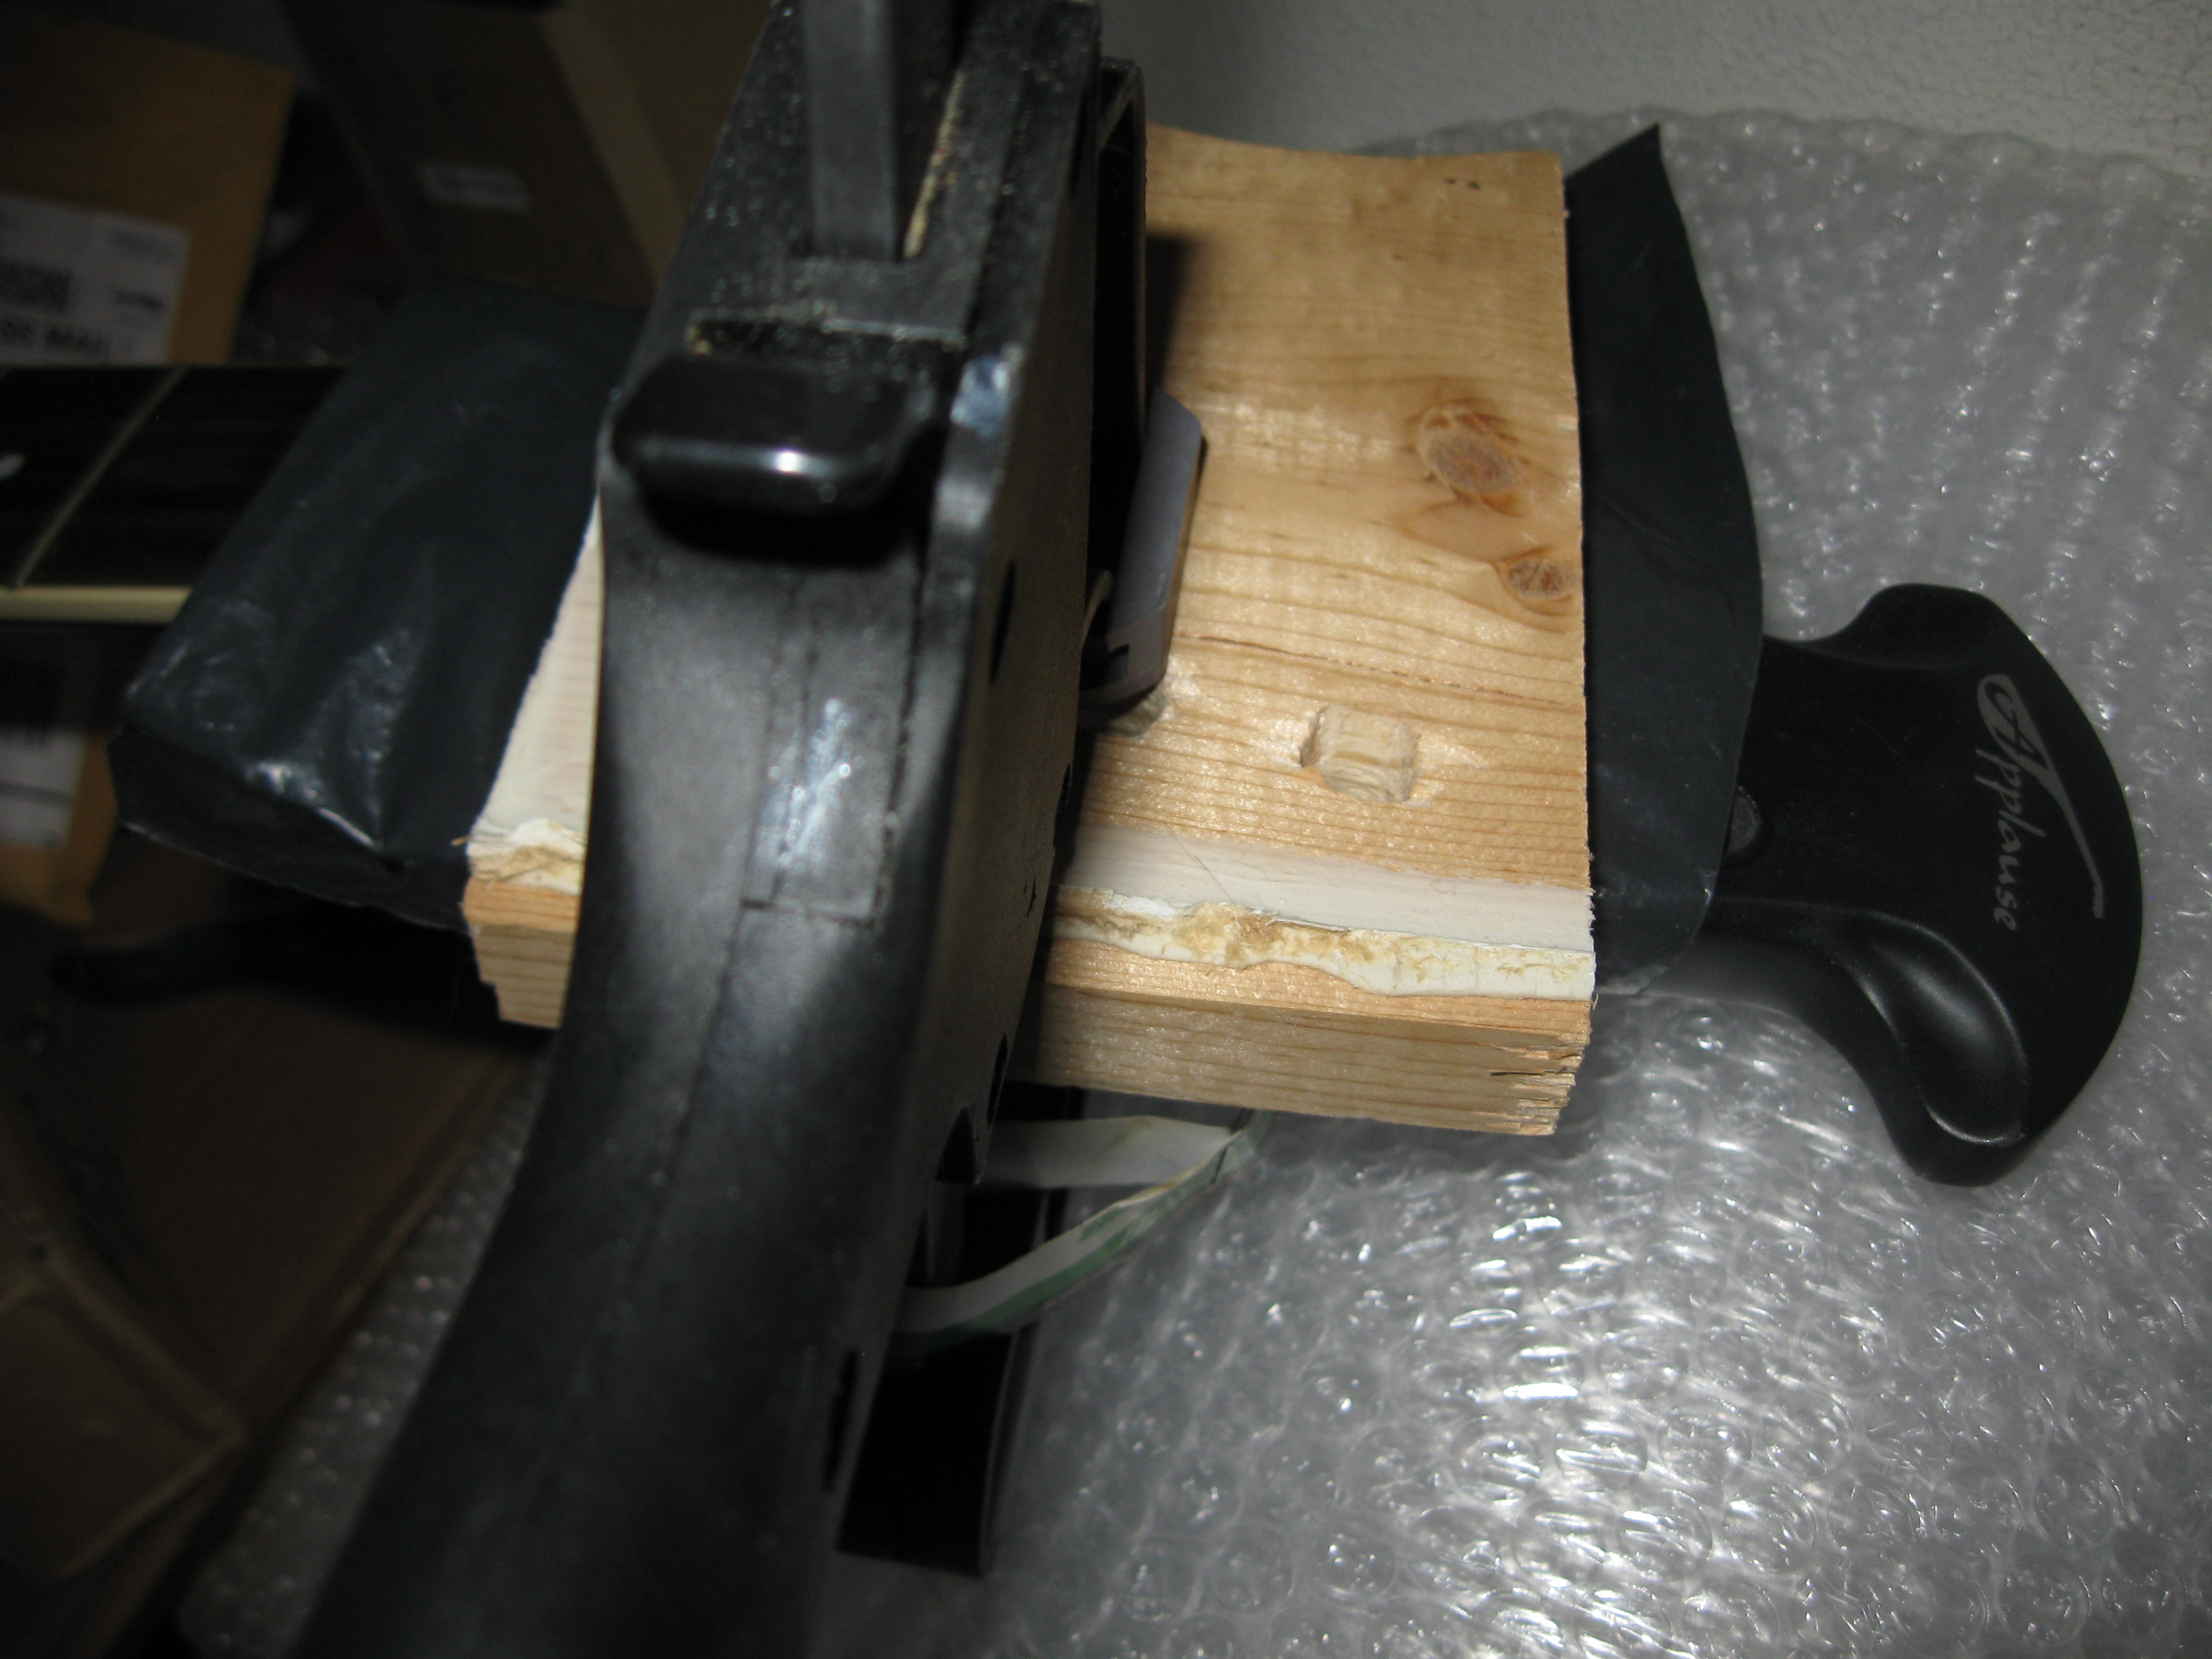
This break went together very nicely and really only required downward pressure, but I need that over a wider area without using two clamps, as there was room at the break for only one clamp, or down force area. I used a block of wood to keep the pressure even and spread it across the surface.
There isn't much to guess at in this part of the repair. Look at the breaks, look at the ends. They will usually fit together snugly. Whatever way they push together remember to use very little force when fitting them so that you do not break more wood from the joint and cause the break to come together too loosely. The snug fit is usually where the pieces belong.
Here I am applying slight outward pressure so you can see how the pieces will fit back together: When I glued the joints I used pressure from my hands to open the break enough to squeeze glue into it. The force of the wood, once I release the break, on the broken area will force the glue down into the break. I opened the break and squeezed plenty of glue into the broken area two or three times to make sure that as the wood came back together the glue was forced down into the break and not simply back out.
I use the aliphatic resin here because even a slow drying cyanoacrylate (Instant Glue) will probably dry faster than I want it to. I also want a semi flexible bond here.
Don't get me wrong, I am not looking for flex that you or I would normally notice, I am looking for something closer to the natural flex this neck wood would have without the break. Aliphatic Resin provides that better, in my opinion, than cyanoacrylate can. That flex should allow the joint to last for the life of the guitar without issues of any kind. Glue, clamp, set aside for 24 hours and then come back to your project.
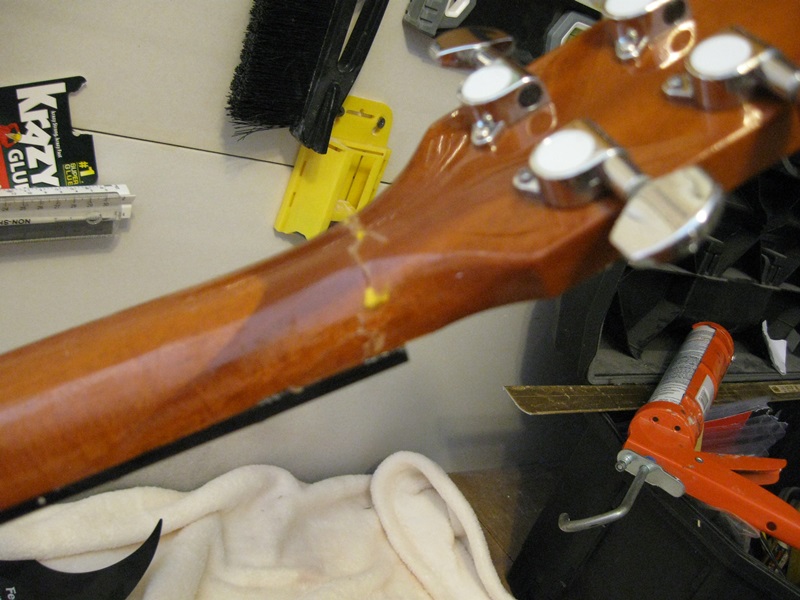
The
thing you should notice here is that the joint has set, and the
reflection of the shop lights on the near surface of the neck form a
perfect arc despite the fact that the neck was repaired in that area.
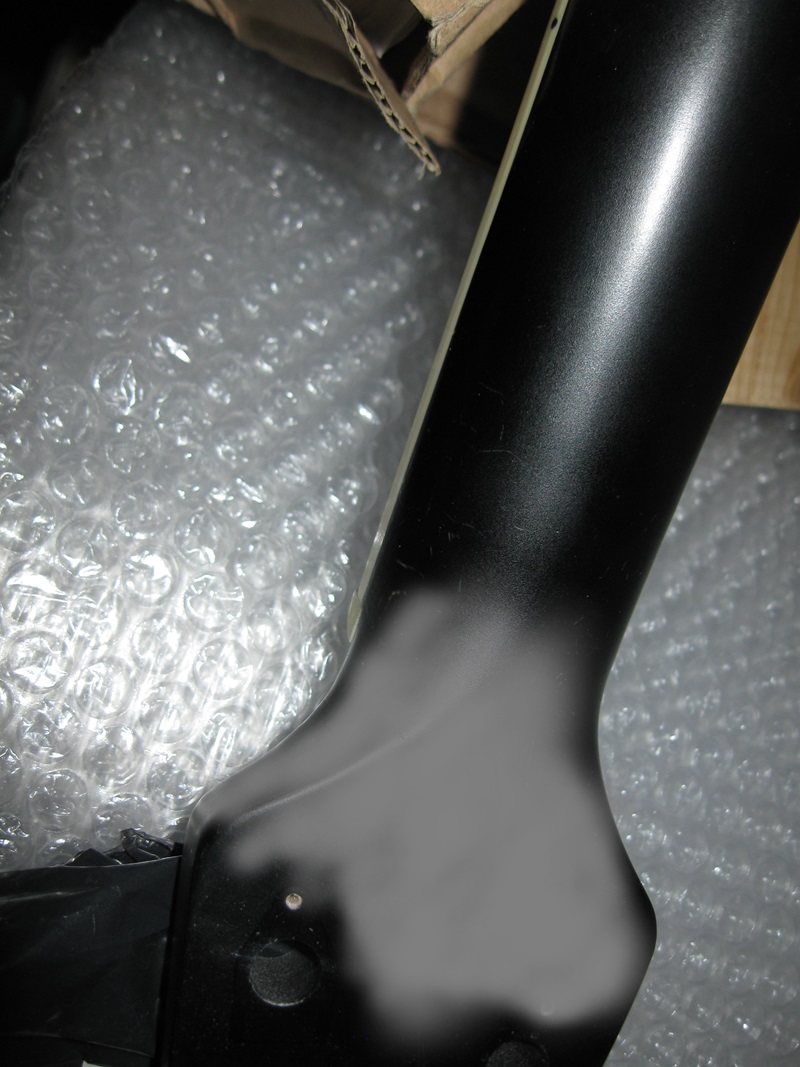
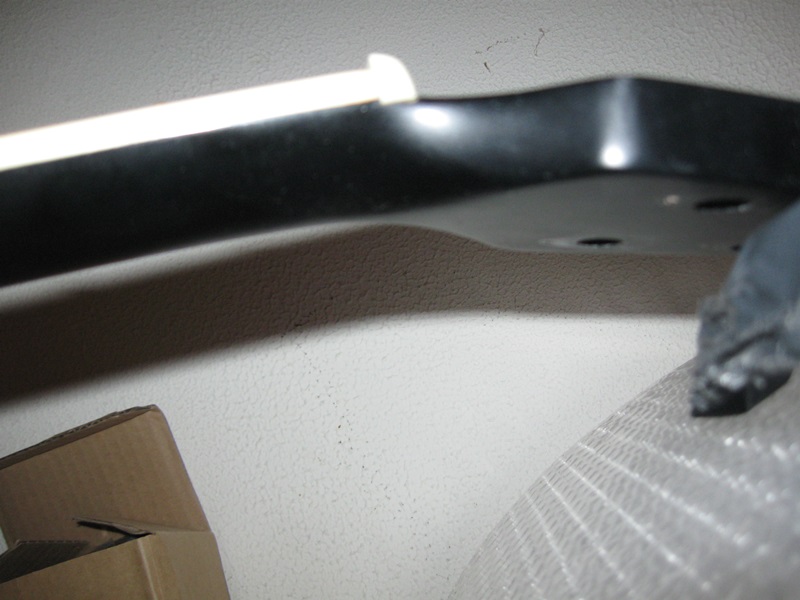
You can see stress fractures in the clear coat from the break. You can also see how well the break has been reset. When I set this break, any break, I make sure my sides are lined up correctly, again I will stress, that I make sure to tread lightly fitting the pieces back together so I don't end up with a bad set. If you are careful the pieces are right back where they were, side by side, interleaved in some cases, and you will have a stronger joint because of that.

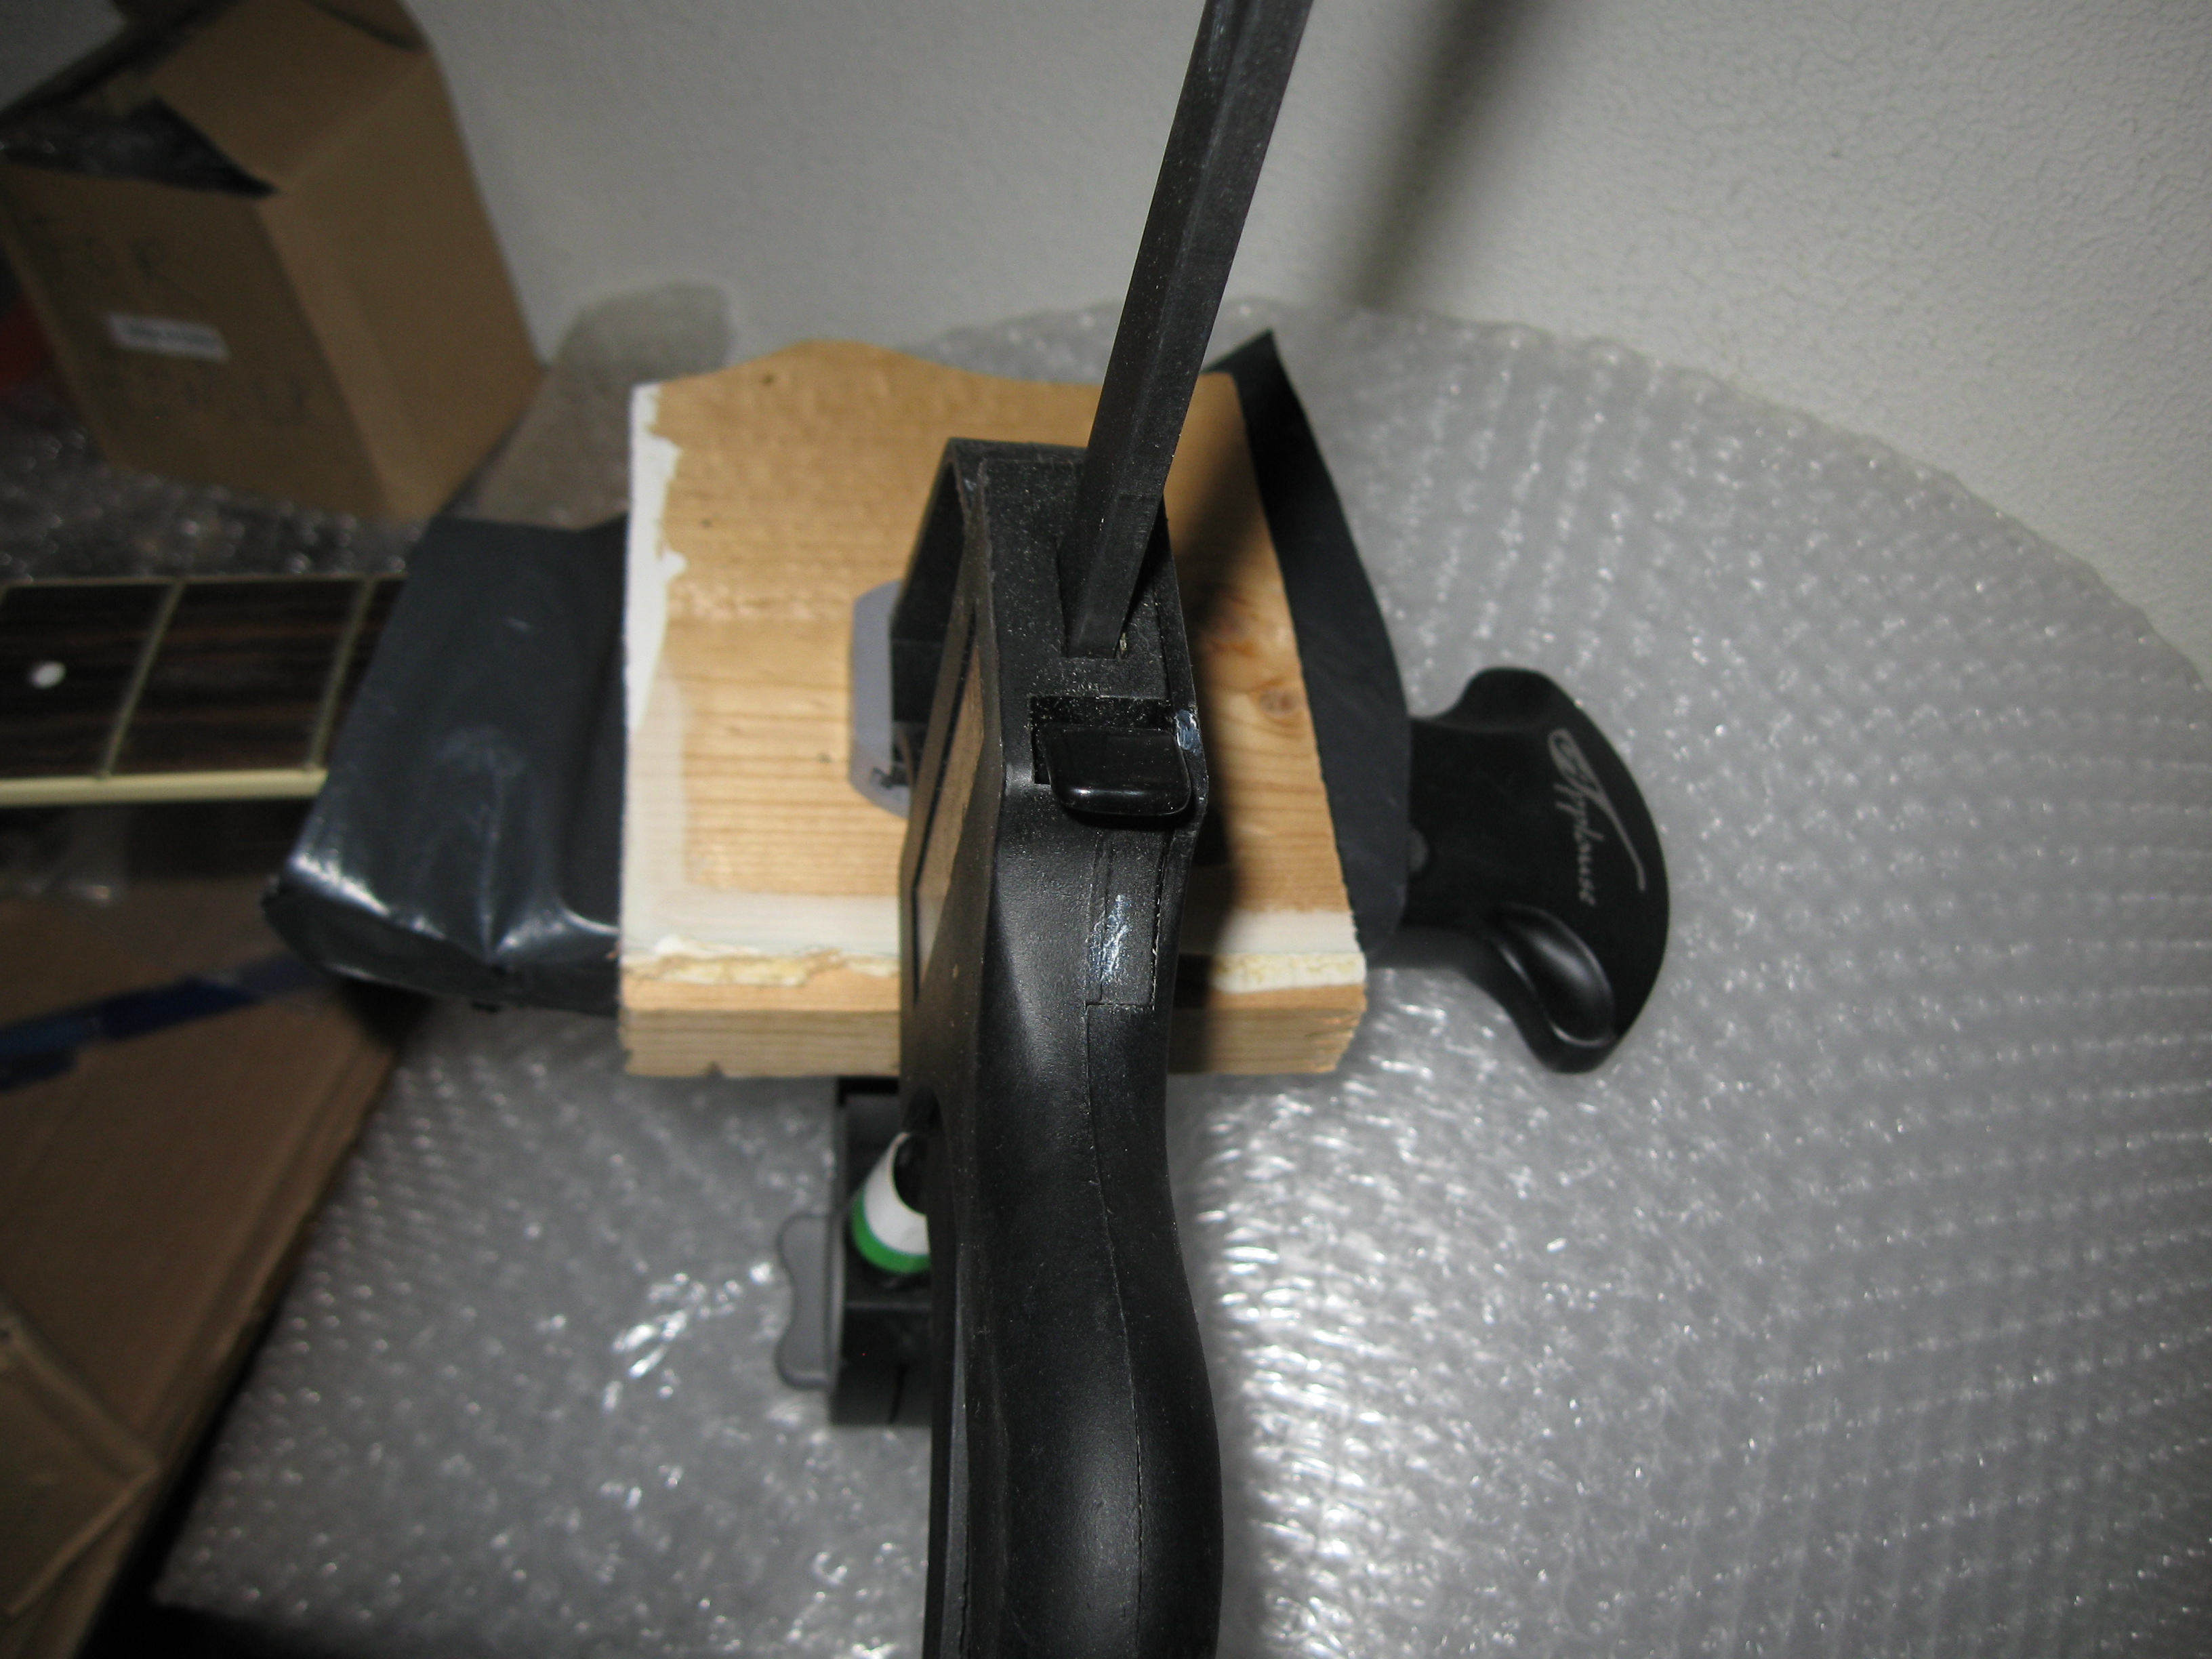
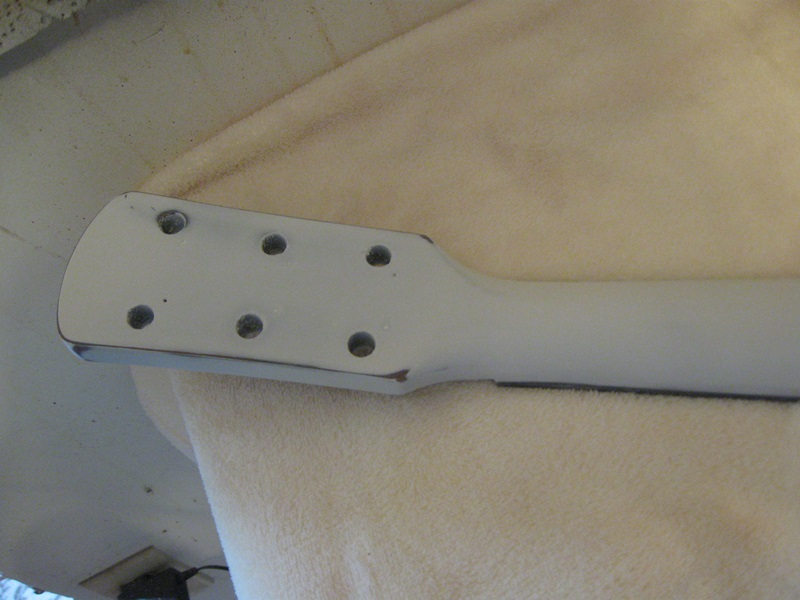
Once your initial repair has cured for 24 hours then do your splices on the back of the neck. These are not difficult splices to make. Here I have routed 1/8” wide slots into the back of the neck. You can see I have done nothing else with this neck at this point, except to cut the slots and glue in the Luan strips.
I could have used Biscuits that are made for joinery, but that would have left an area to cut off in any case, so it's easier to simply cut pieces from Luan scraps and use them. This is simply reinforcing the repair so that when there is forward flex because of string tension the neck will not deform. It isn't a large repair area, it isn't a particularity deep repair, it is relatively small but it adds significant strength to this repair to help it remain stable.
I used a hand held zip type router, but any small hobby sized router will do. I like the zip type router because it is so small and lightweight, and I have used it so often that I am comfortable using it by hand without a guide. I made a very low pass, I call it scratching the surface, to set my line. The second pass is deeper and stays straight because I made the first cut very light, yet it scored the wood and the bit follows that scoring in a straight line.
If you are not comfortable using a router free hand then take the guard and run it right down to the edge of the neck.
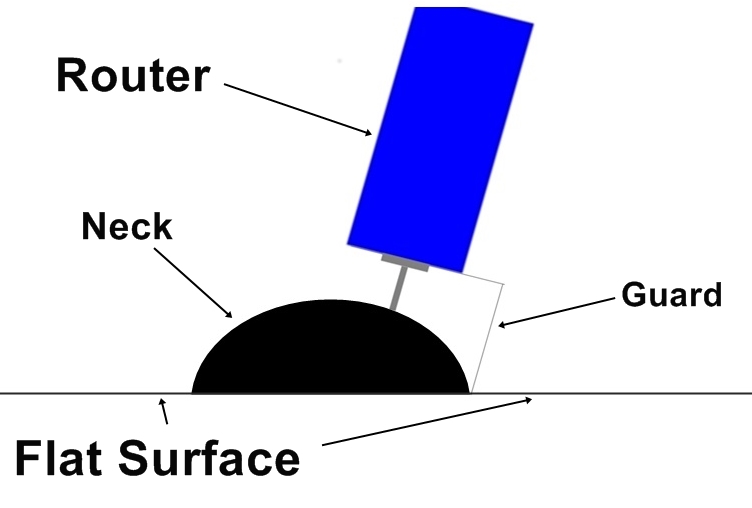
Lay the neck on a flat surface and clamp it to hold it securely. Using the stock guide or building one from a piece of metal, run it down along the edge of neck as shown in the illustration to help guide the router in your hand. This will make one side solid for you and serve as a relatively straight guide to cut the groove. You are going to cut a 4” long grove with the router. Cut it very lightly into the surface. I would suggest no more than 1/16”. This will stabilize your following passes as you deepen the splice. Remember to stay to the outside of the neck, away from the center section that houses the truss rod.
I do these two repairs separately because it is too much to juggle at one time. I prefer to do the initial neck repair and then cut my slots to introduce the Luan splines.
The major points of both these repairs are making sure that you are setting the initial break correctly. This involves looking the break over, checking it for wood loss.
Dry clamp the pieces to see how they will compress, how the pieces will fit.
When you do clamp the pieces make sure to use protection on the clamp jaws; make sure you do not over tighten the area. Too much pressure can damage the wood. It can also force too much glue from the repair areas where it is needed.
Sand
down the repair and apply your finish. For the Fender Acoustic
example we were building a studio guitar and the finish was a concept
we threw together. A kind of worn bang around finish as shown. I
rounded the top of the headstock over sprayed it with primer, sanded
it back and then cleared it.
With the ovation, on the other hand, the finish was going to be blended back to the stock black and clear coated. I use basic lacquer primers. Gray, white, black, red, it dries fast and the colors can bring me back to a closer match to a painted surface fairly quickly. If I am working with wood I can use a clear lacquer primer, or sealer to achieve the same ends, sealing the wood and the area. The break areas were sanded with 220 grit wet or dry sandpaper and then primed or sealed. They were then sanded with 320, 400 and then 1000 grit and re-primed. If there are problem areas I will find them then. Pinholes, scratches that escaped my eye, an additional coat of primer or a small amount of lacquer spot putty will fix the larger pin holes or scratches. Sand that to 1000 grit and then re-prime.
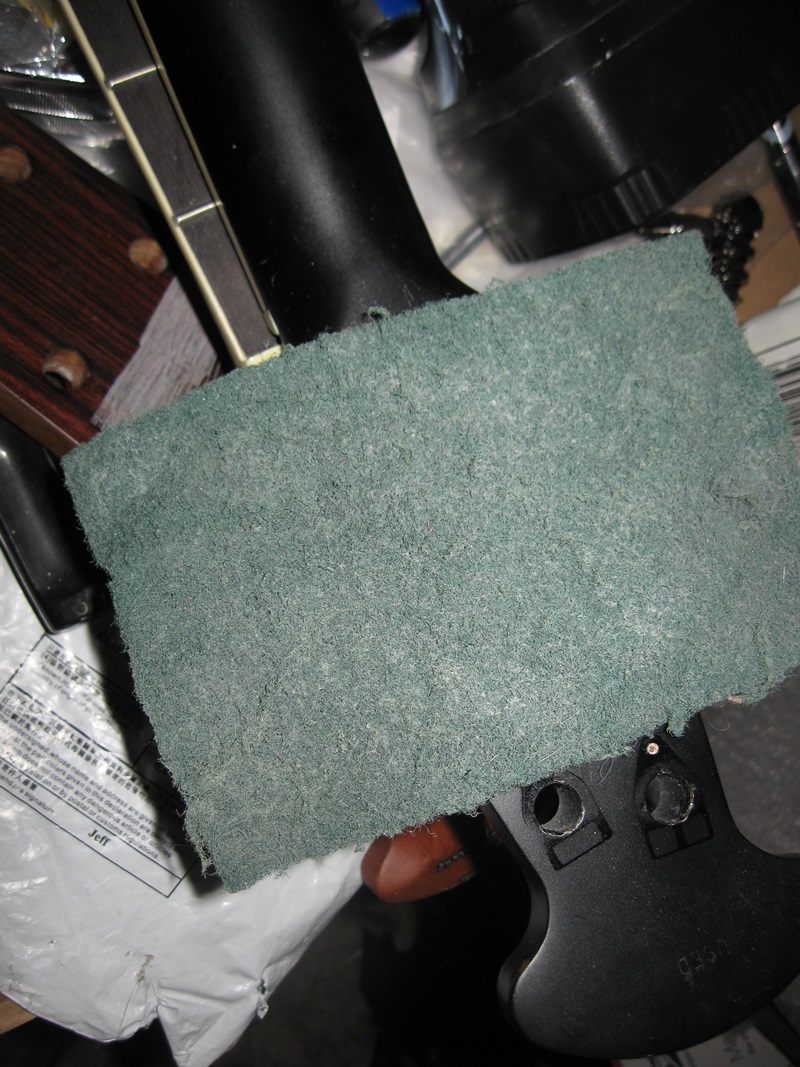
1200 grit pad. This works great to rough up the surface around the repair after a light coat of black lacquer. I hit the surface with the pad, cleaned it with lacquer thinner, which also readies the paint, and then I simply blended the black down into the original finish.
I waited 24 hours and then lightly scuffed the surface before I shot the clear coat and blended it up the neck. I could have simply left this with the black lacquer, but the paint coat is often burned through in the finishing of the piece. The clear will solve that problem, helping to keep your repair area invisible. Two coats of clear and then a small amount of lacquer thinner with a little clear mixed in is sprayed at the edges of the painted area, next a light coat of lacquer thinner, a misting really, over the entire repair area.
This is not hard to do. First, you have sprayed your clear coats and you are going to dump that and clean your gun/spray equipment. Simply leave a small amount of the clear in the gun, add some lacquer thinner. Over spray the area. Dump that and add straight lacquer thinner you will use to clean the gun. Over spray the edges of the area with that. Finish cleaning your gun. This will allow the paint to blend. It works equally well with lacquer or acrylic, urethane.
You can also use a rattle can black and clear it. Simply spray the black, let it dry. Then use your rattle can clear to cover the repaired area. Over spray the painted area and allow the paint to taper off, dull out, as you proceed away from the repaired area.
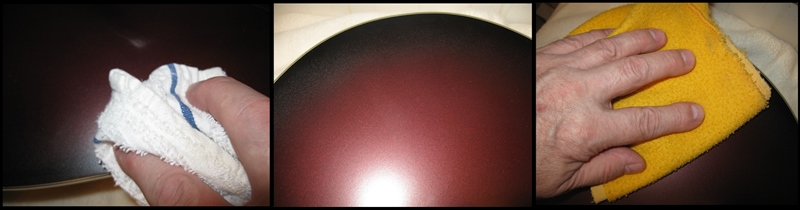
Let the repaired area set for 48 hours, then use a low grade buffing compound on a soft cloth to blend the area in. Once more with a clean cloth and some polishing compound and you will have a smooth, flat finish from the rattle cans that is easily as good as the spray equipment.
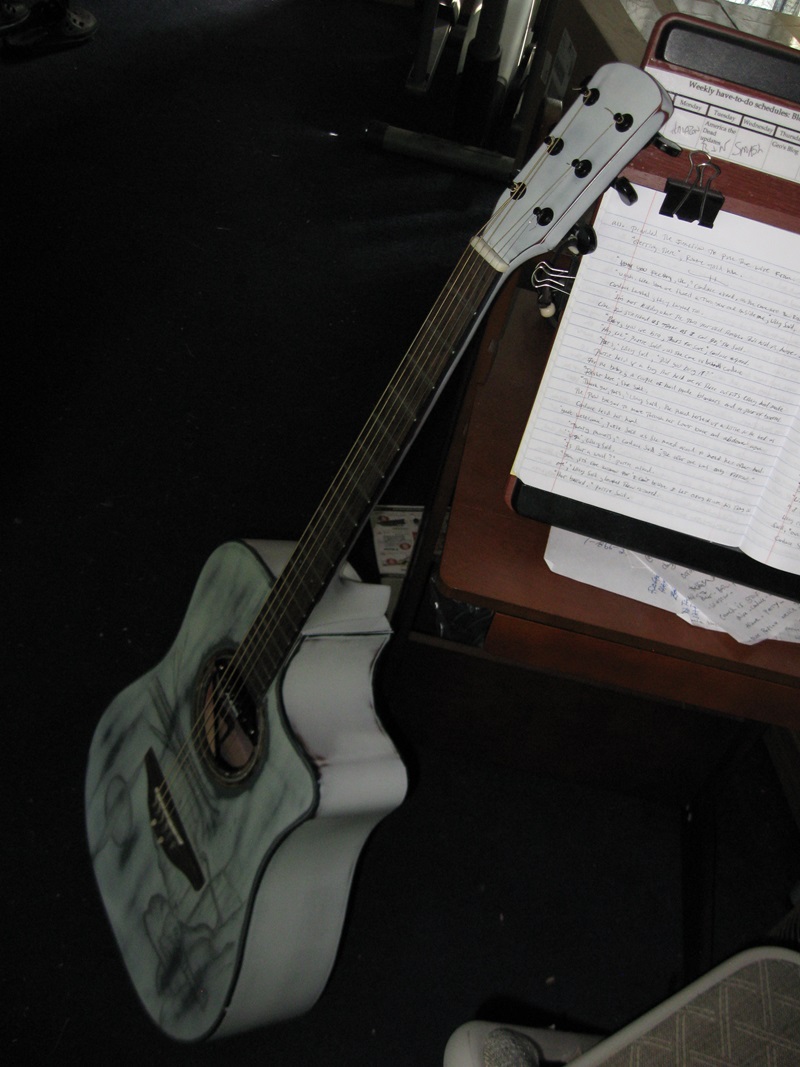
Finished products. The ovation ended up making a nice studio guitar. It has a good solid sound. I have less than $60.00 in it.
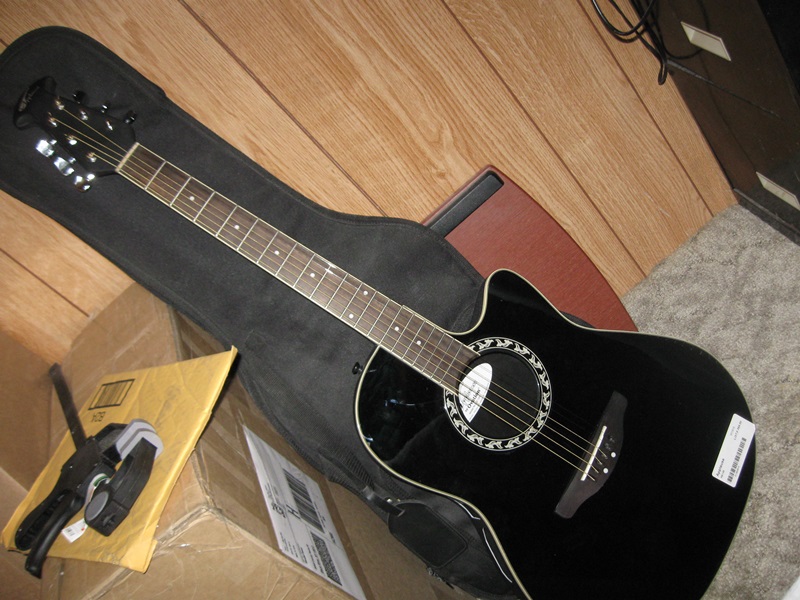
The Fender CD60 became an instant favorite. Not only do I like the feel of it and the play-ability, I like the quick finish we did for it.
See the complete build: Guitar Works Four: Amazon - Paperback